Best Homemade Soy Milk / Everything You Need to Know!
At last! A homemade soy milk recipe that shares everything you need to know to make creamy, fresh soy milk from scratch with NO bitterness! This recipe is vegan, gluten-free, and simpler than you think.
💪 Why This Recipe Works
This recipe is not difficult, but it does require patience and a bit of planning. Happily, this post shares everything you need to know about making homemade soymilk that tastes just like store-bought soy milk, plus what to do with the leftover okara (soybean pulp) and my 3 secrets to success. Let’s start there.
3 secrets to making fresh homemade soymilk with NO Bitterness.
If you have tried making soymilk at home and found it watery, bitter, and pretty much undrinkable, all is not lost! With these 3 secrets, I’m confident you will master the art of making fresh soy milk and kiss the high price of commercial soy milks goodbye.
1️⃣ Remove the skins from the soaked soybeans. SO important!
2️⃣ Simmer the deskinned soybeans for 10 minutes before blending them with water.
3️⃣ After blending the simmered soybeans with water and then straining the mixture through a nut milk bag, simmer the soy milk for a full 15 minutes.
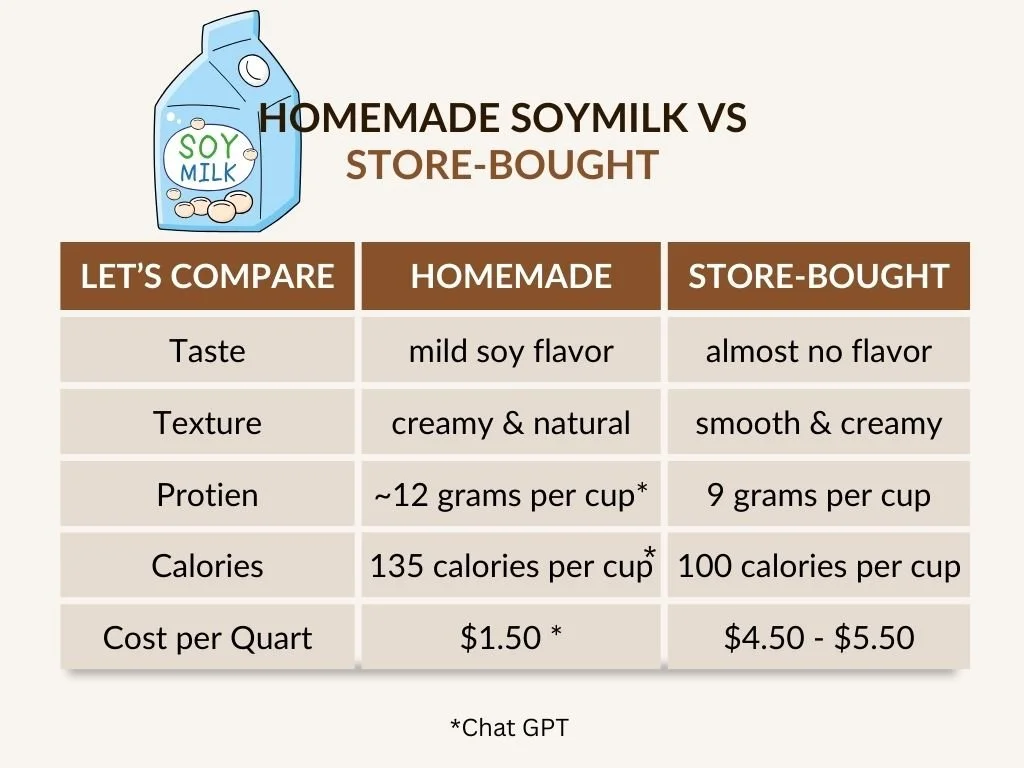
📊 Handy Comparison Chart
🥣 Equipment Needed
Let’s continue on our journey with the equipment and ingredients you’ll need.
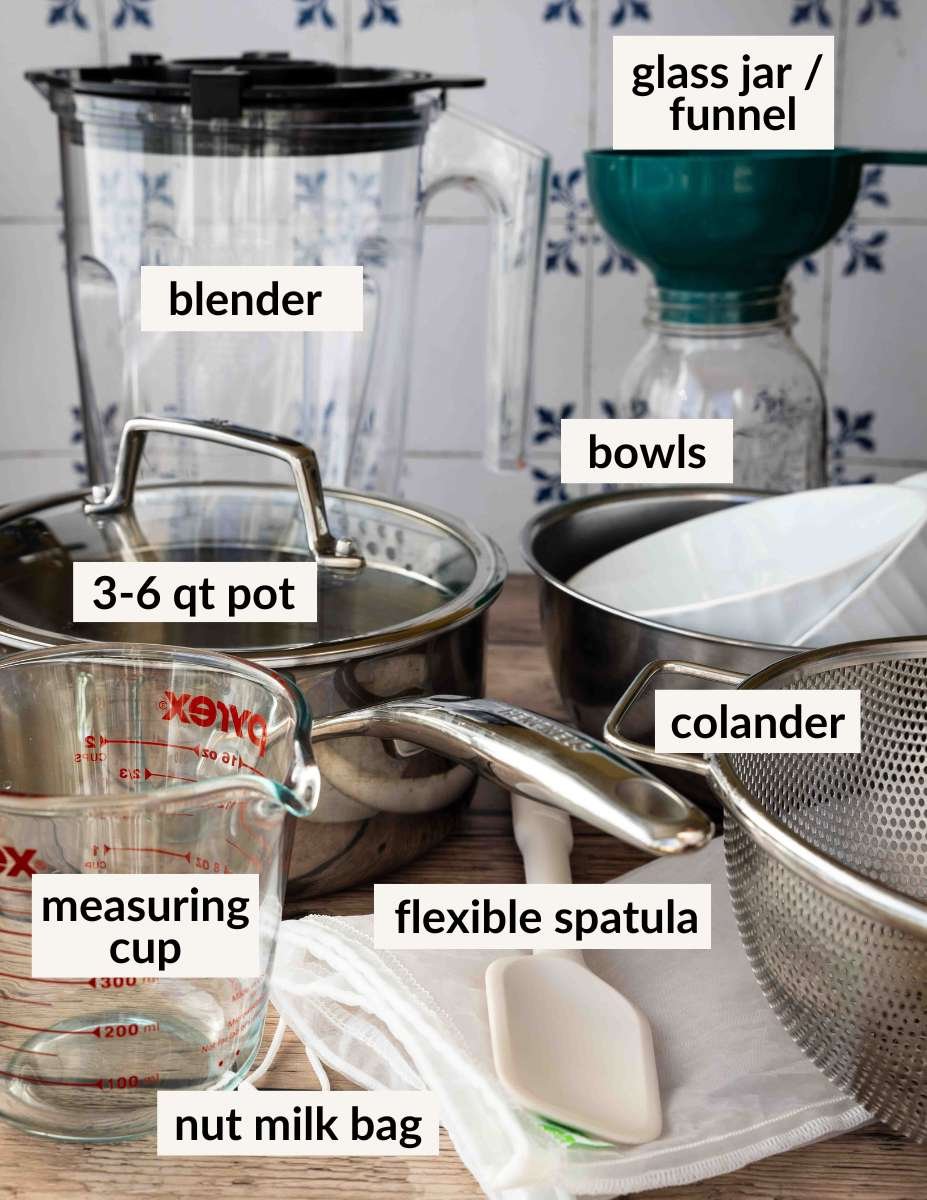
Measuring cup- A liquid measuring cup is just fine for both the dry soybeans and the water. If you have one on hand, a kitchen scale is handy for accurately measuring the beans.
Bowls- You will need 3 bowls. One medium-sized bowl for cold soaking the dry soybeans. Then 2 smaller bowls for removing the skins.
3-6 quart pot with a lid- This large pot is big enough for all 3 cooking phases of the soy milk making process. Keep the lid on when simmering the soy milk to guard against over-reducing.
Flexible spatula- This handy tool is soft yet firm enough to drag across the bottom of the pot to prevent the soybean pulp (okara) from settling at the bottom and sticking.
Colander- After simmering the deskinned soybeans, you will need a colander to drain and rinse them with cold water.
Blender- Choose a large-capacity high-speed blender like a Nutribullet or a Kitchen Aid to power through 5 cups of water and all the soybeans.
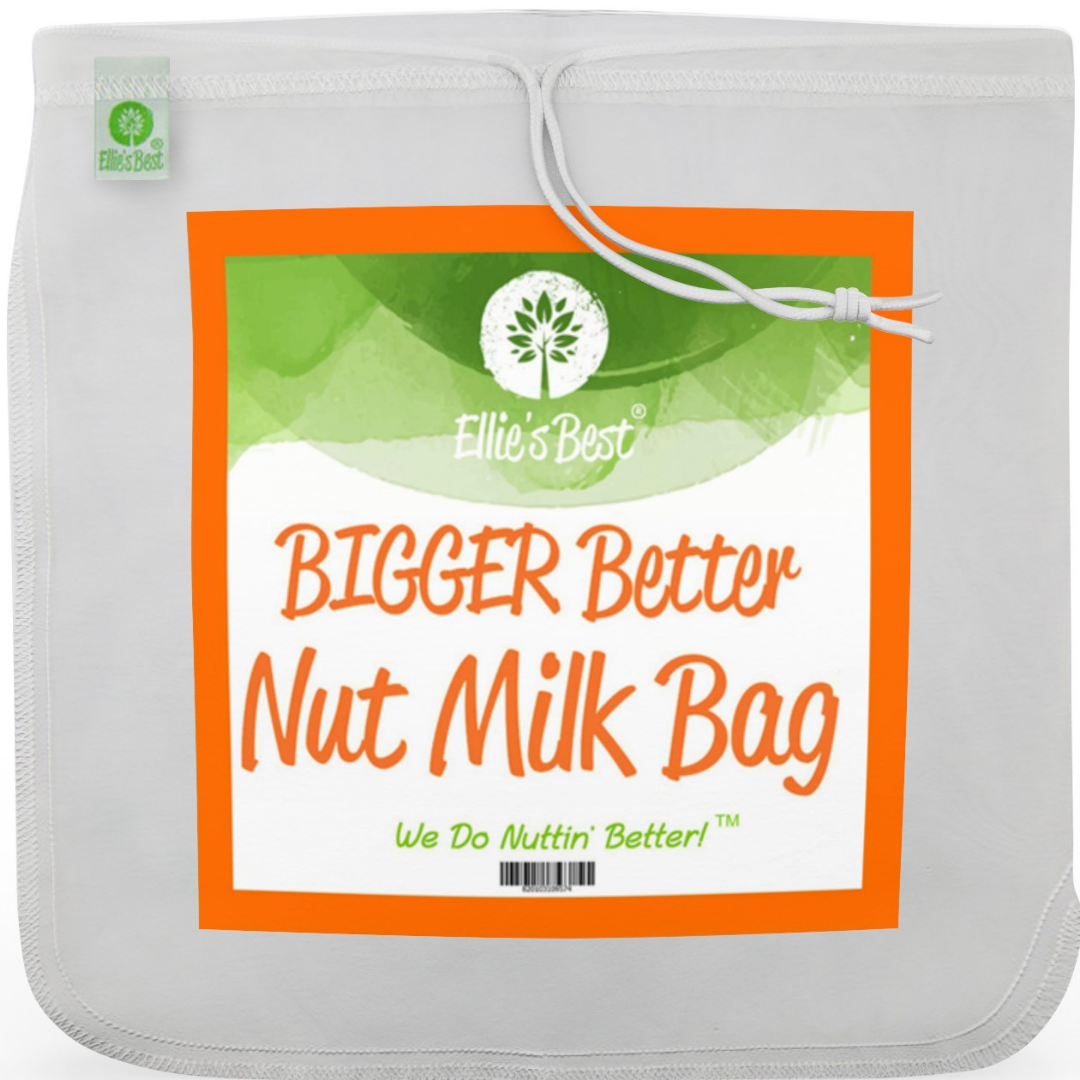
Nut milk bag- There are lots to choose from. You’ll want one that is large, fine-meshed, and sturdy enough for repeated use. My favorite is Ellie’s Best Nut Milk Bag. USE CODE CVC10 FOR A 10% DISCOUNT!
Wide-mouth funnel- Not absolutely essential, but handy for transferring the soy milk from the cooking pot to the jar without spills.
1 Quart storage jar- A glass jar, like a mason jar, is ideal. Choose one that is heatproof and easy to pour from.
🔖 2 Simple Ingredients
You’ll find the complete ingredient list with measurements and instructions in the recipe card at the bottom of this post.
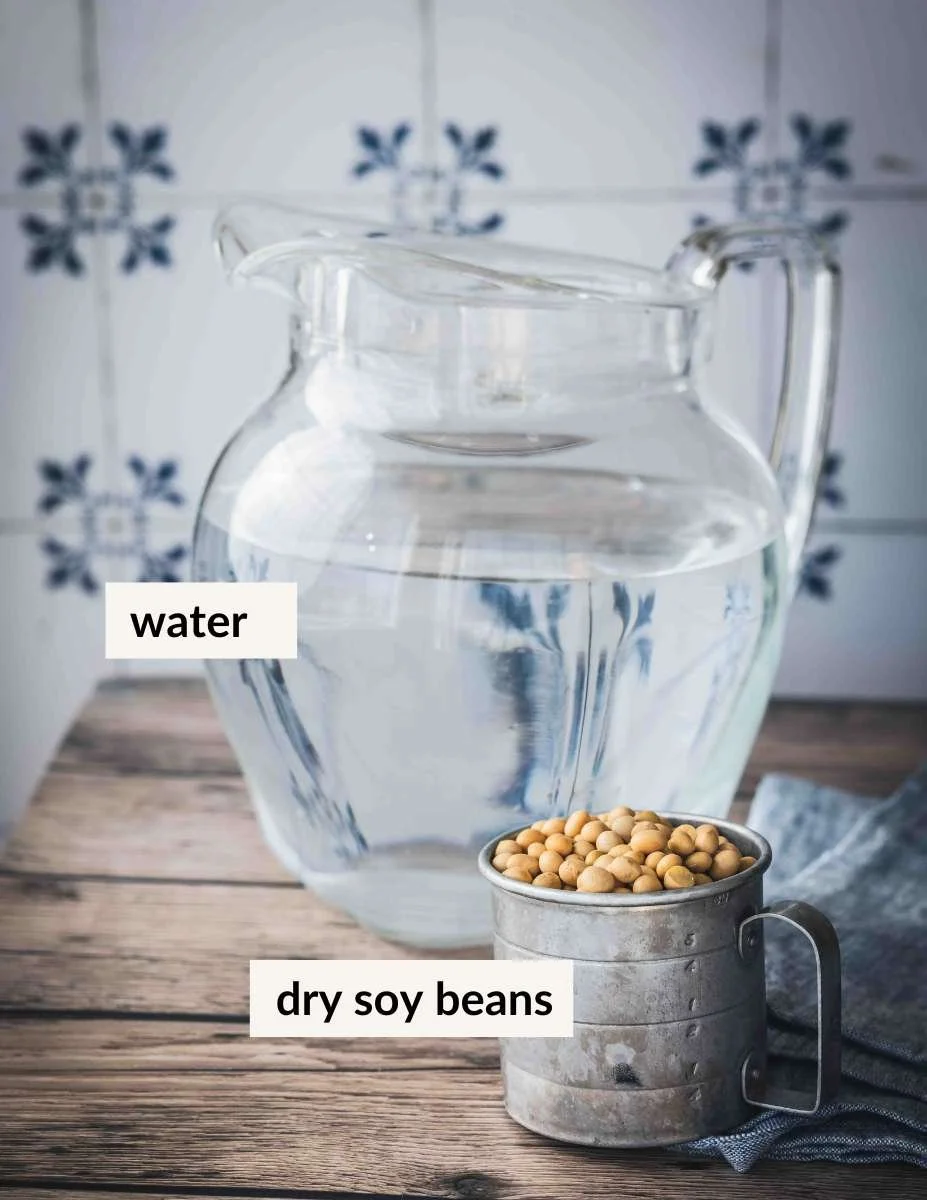
Soybeans- For the cleanest homemade soy milk, use organic soybeans. These are easily sourced in the bulk section of your natural grocery store, or with the other beans in most grocery stores, or found online.
👉🏼 If you can locate a reliable source of dehulled soybeans, which allows you to skip the deskinning process, by all means, go for it!
Water- You’ll need lots of it! 13 cups plus more for rinsing the cooked and drained soybeans, and clean-up.
🥛 How To Make Fresh Soy Milk (With Photos)
When you’re ready to make this recipe, scroll down to the recipe card at the end of this post. You’ll find the complete ingredient list with measurements there.
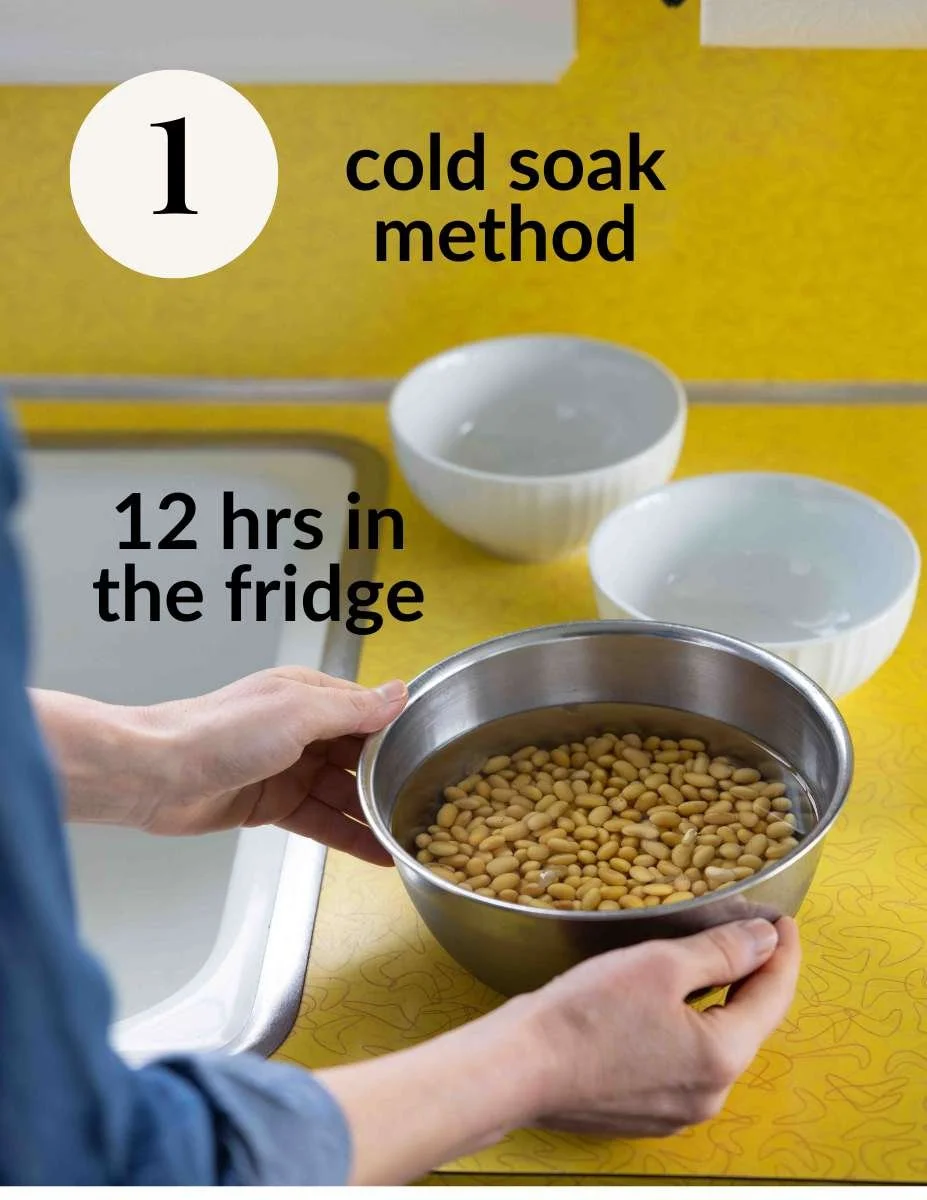
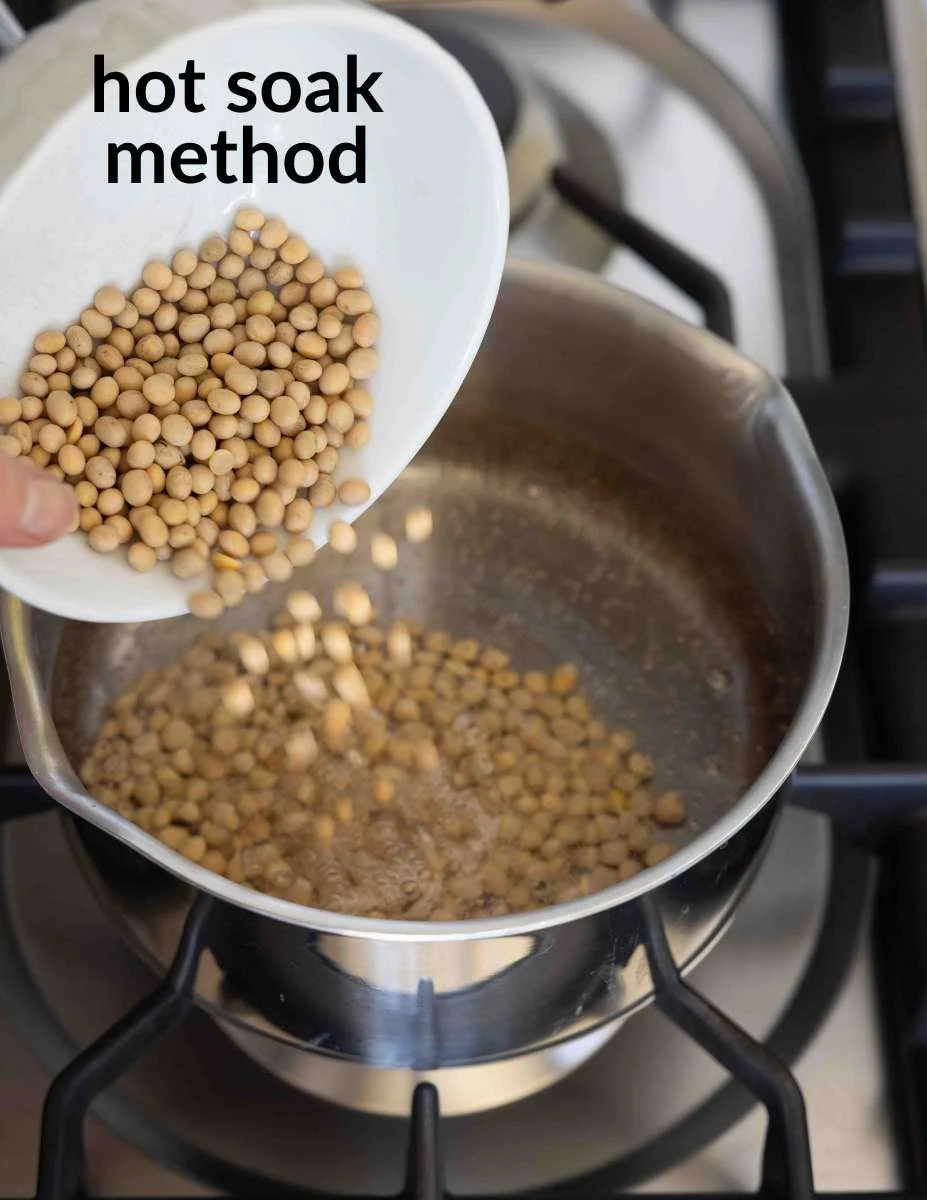
1. First, cold OR hot soak the dried soybeans.
Cold soak – Add the dry soybeans to a medium-sized bowl with 4 cups of water. Place in the fridge for 12 hours. They will double in size.
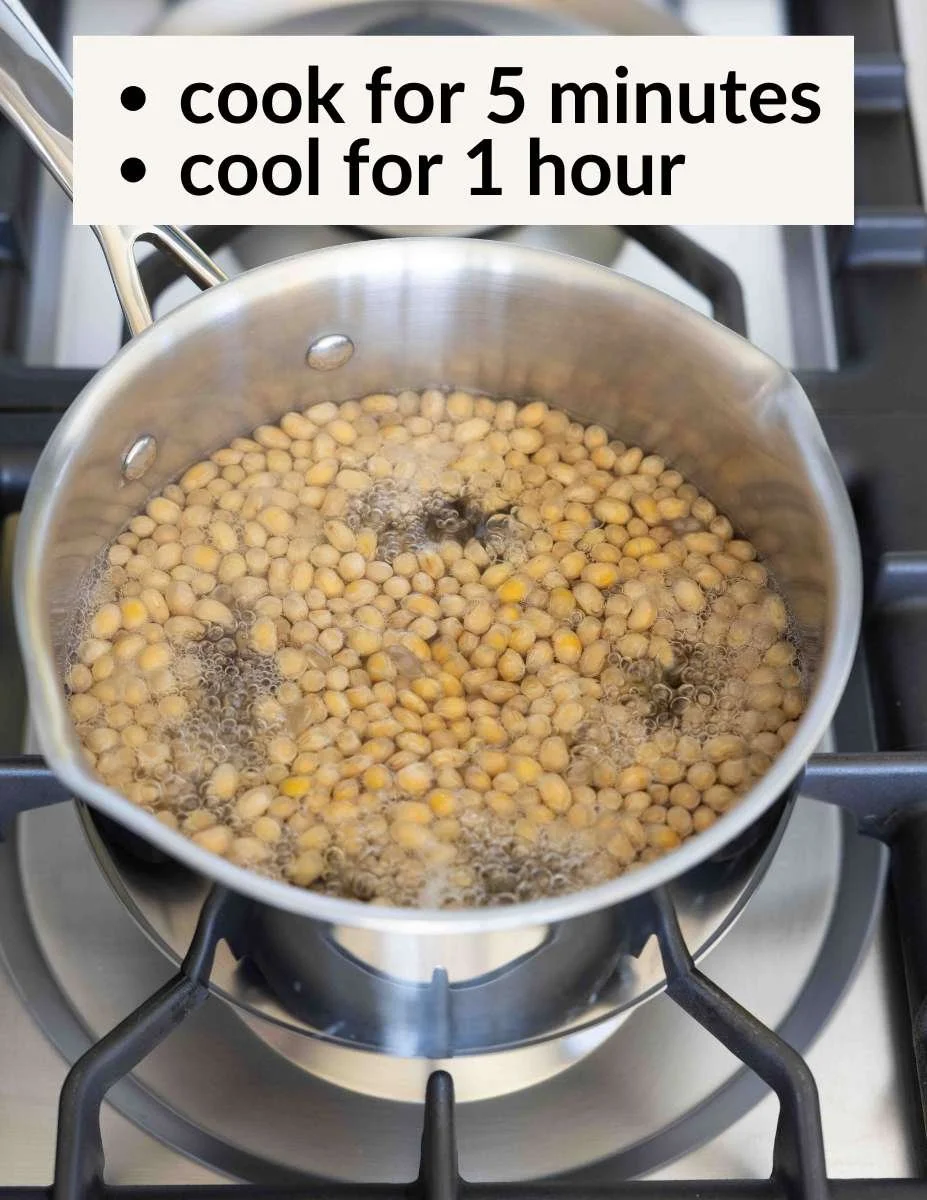
Hot soak – In a 3-6 quart pot, bring 4 cups of water to a rapid boil over high heat. Pour in the dry soybeans. Cook for 5 minutes. Slide the pot off the heat and then let cool for 1 hour. They will double in size.


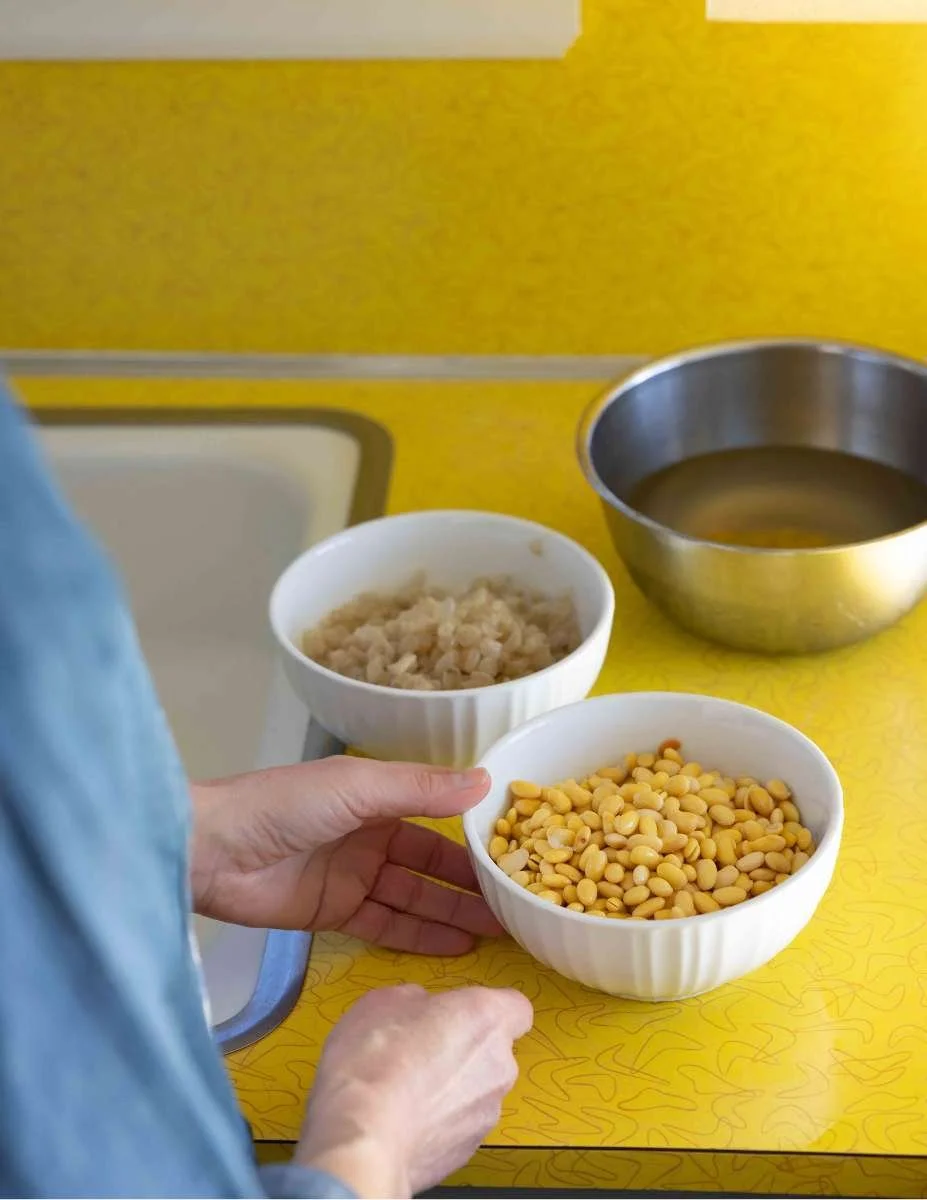
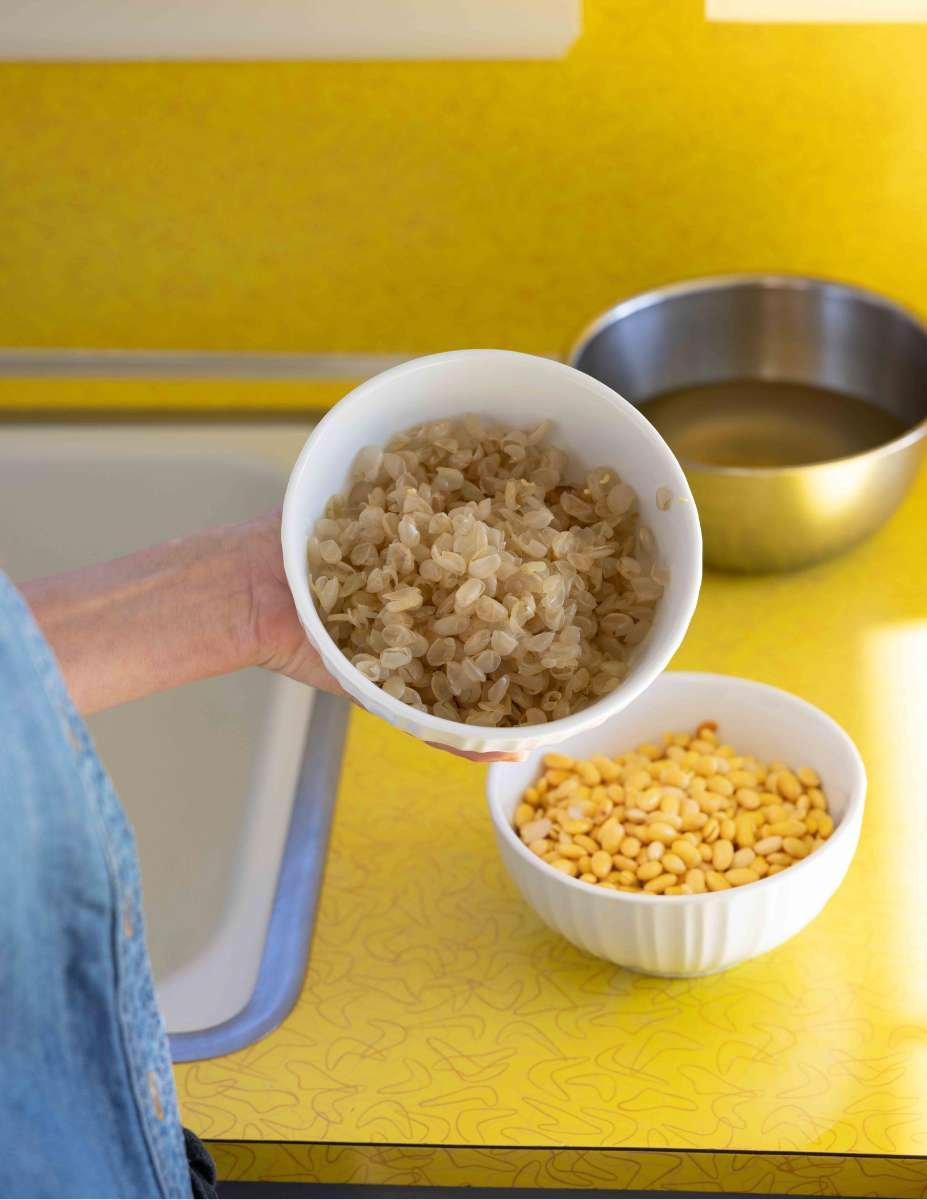
2. Next, remove the skins from the soaked soybeans:
Before diving in, reassure yourself that it only takes about half an hour to remove all the skins. You can do this! Have 2 bowls ready- one for the deskinned soybeans and one for the skins. Scoop up a small handful of soaked soybeans in your hand. Use the other hand to pinch each bean (yes, each bean separately) between your fingers, removing the skin. The skin goes in one bowl; the soybean goes in the other. See note 1
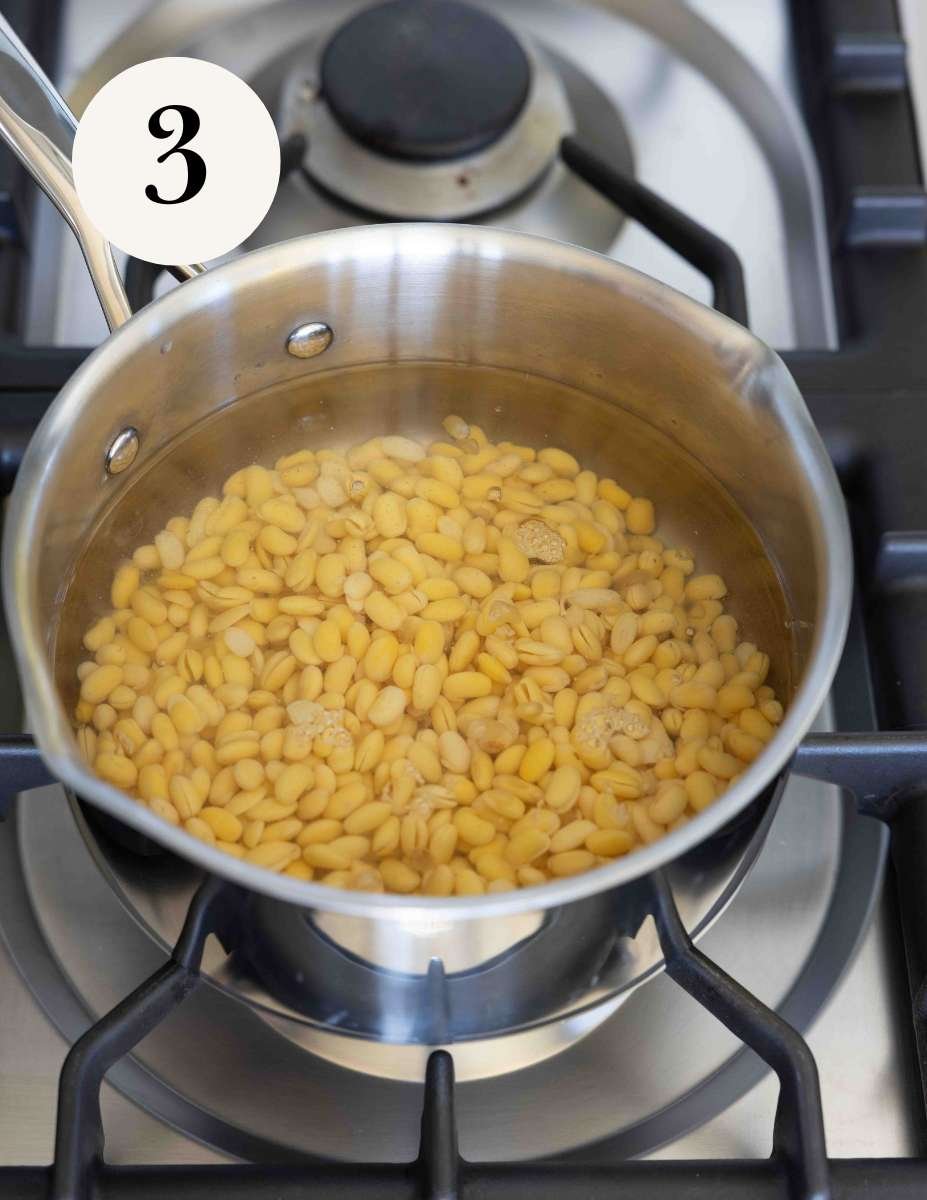
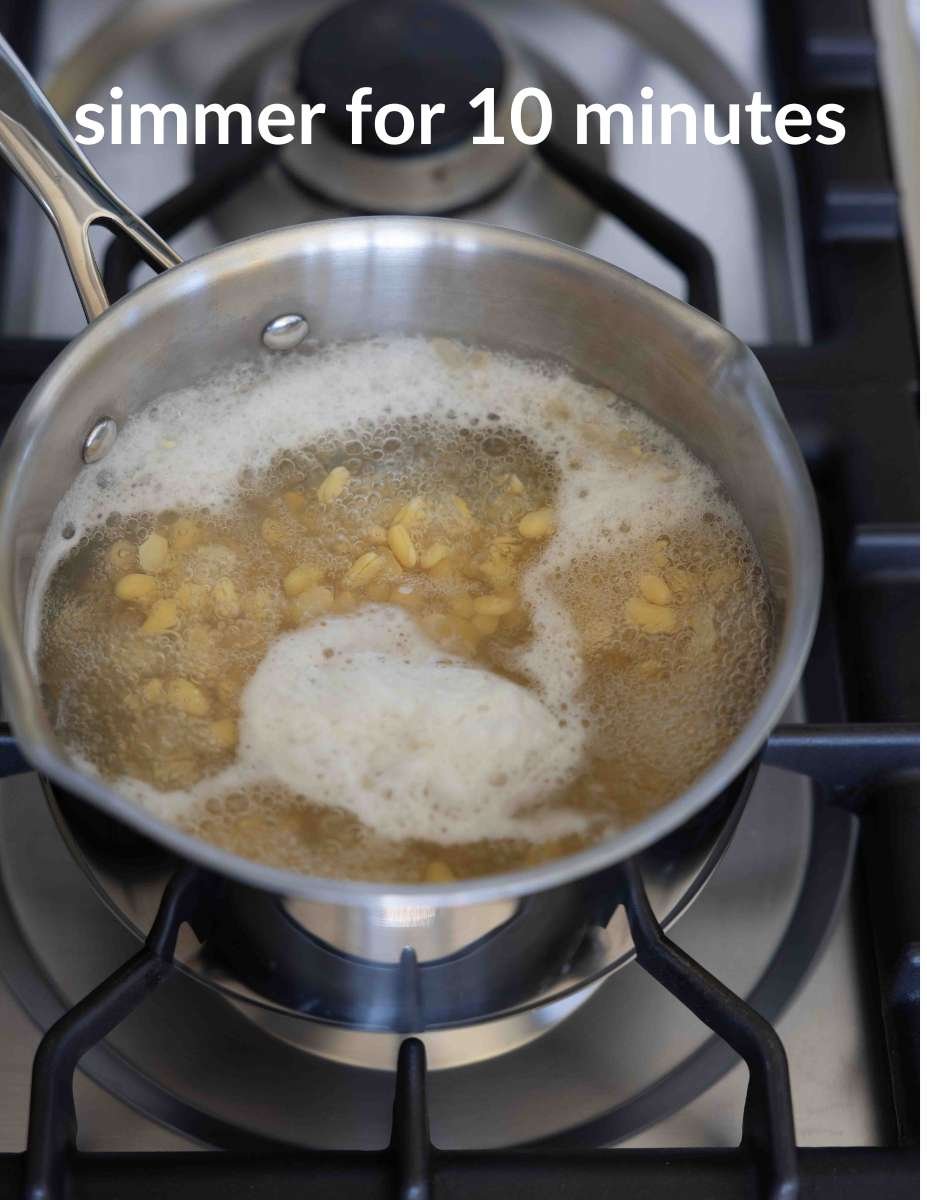

3. Simmer the deskinned soybeans before blending:
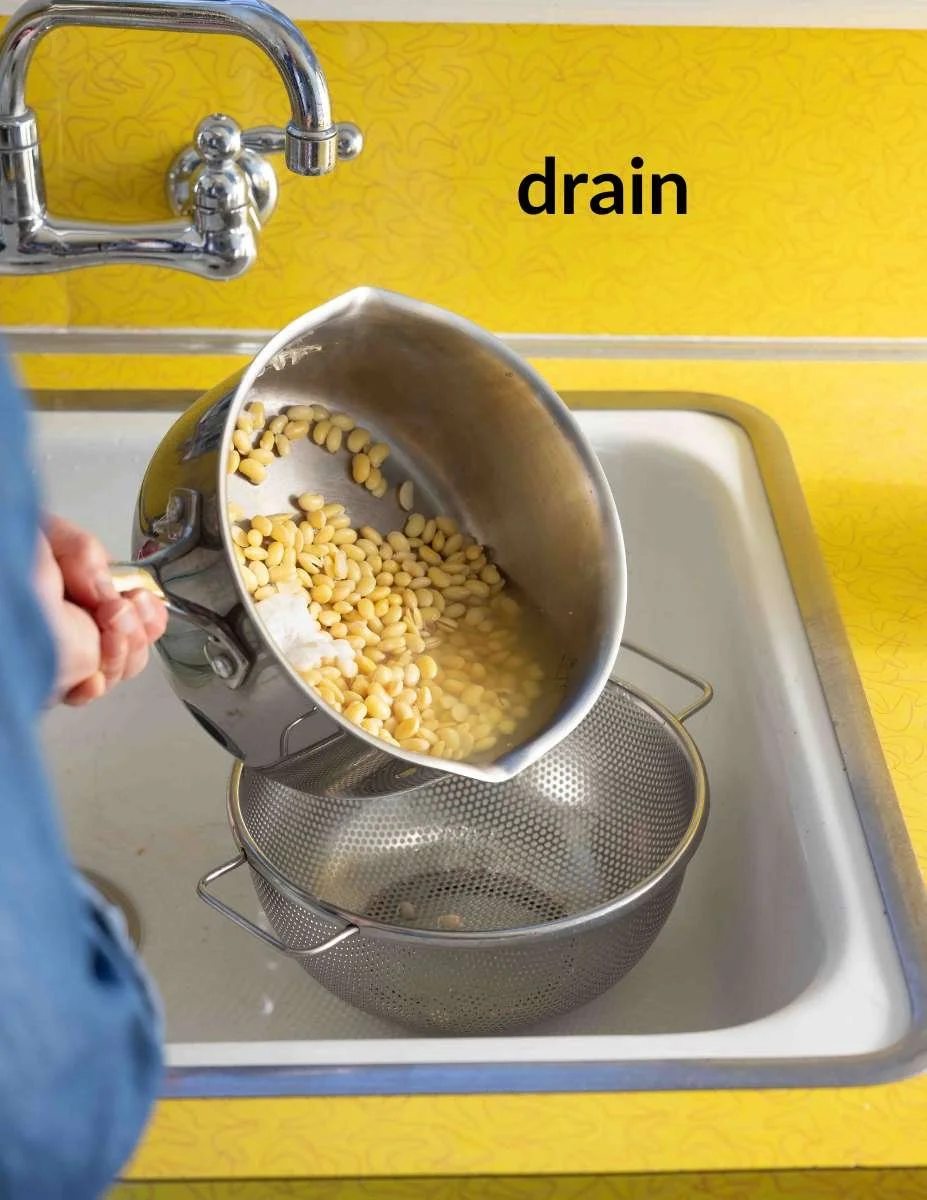
Add the deskinned soybeans and 4 cups of fresh water to the 3-6 quart pot. Bring to a boil and then reduce the heat to maintain a lively simmer. Cook for 10 minutes. Please don’t be tempted to skip this step! It is crucial to remove any bitterness. Drain in a colander and rinse the soybeans in cold water.

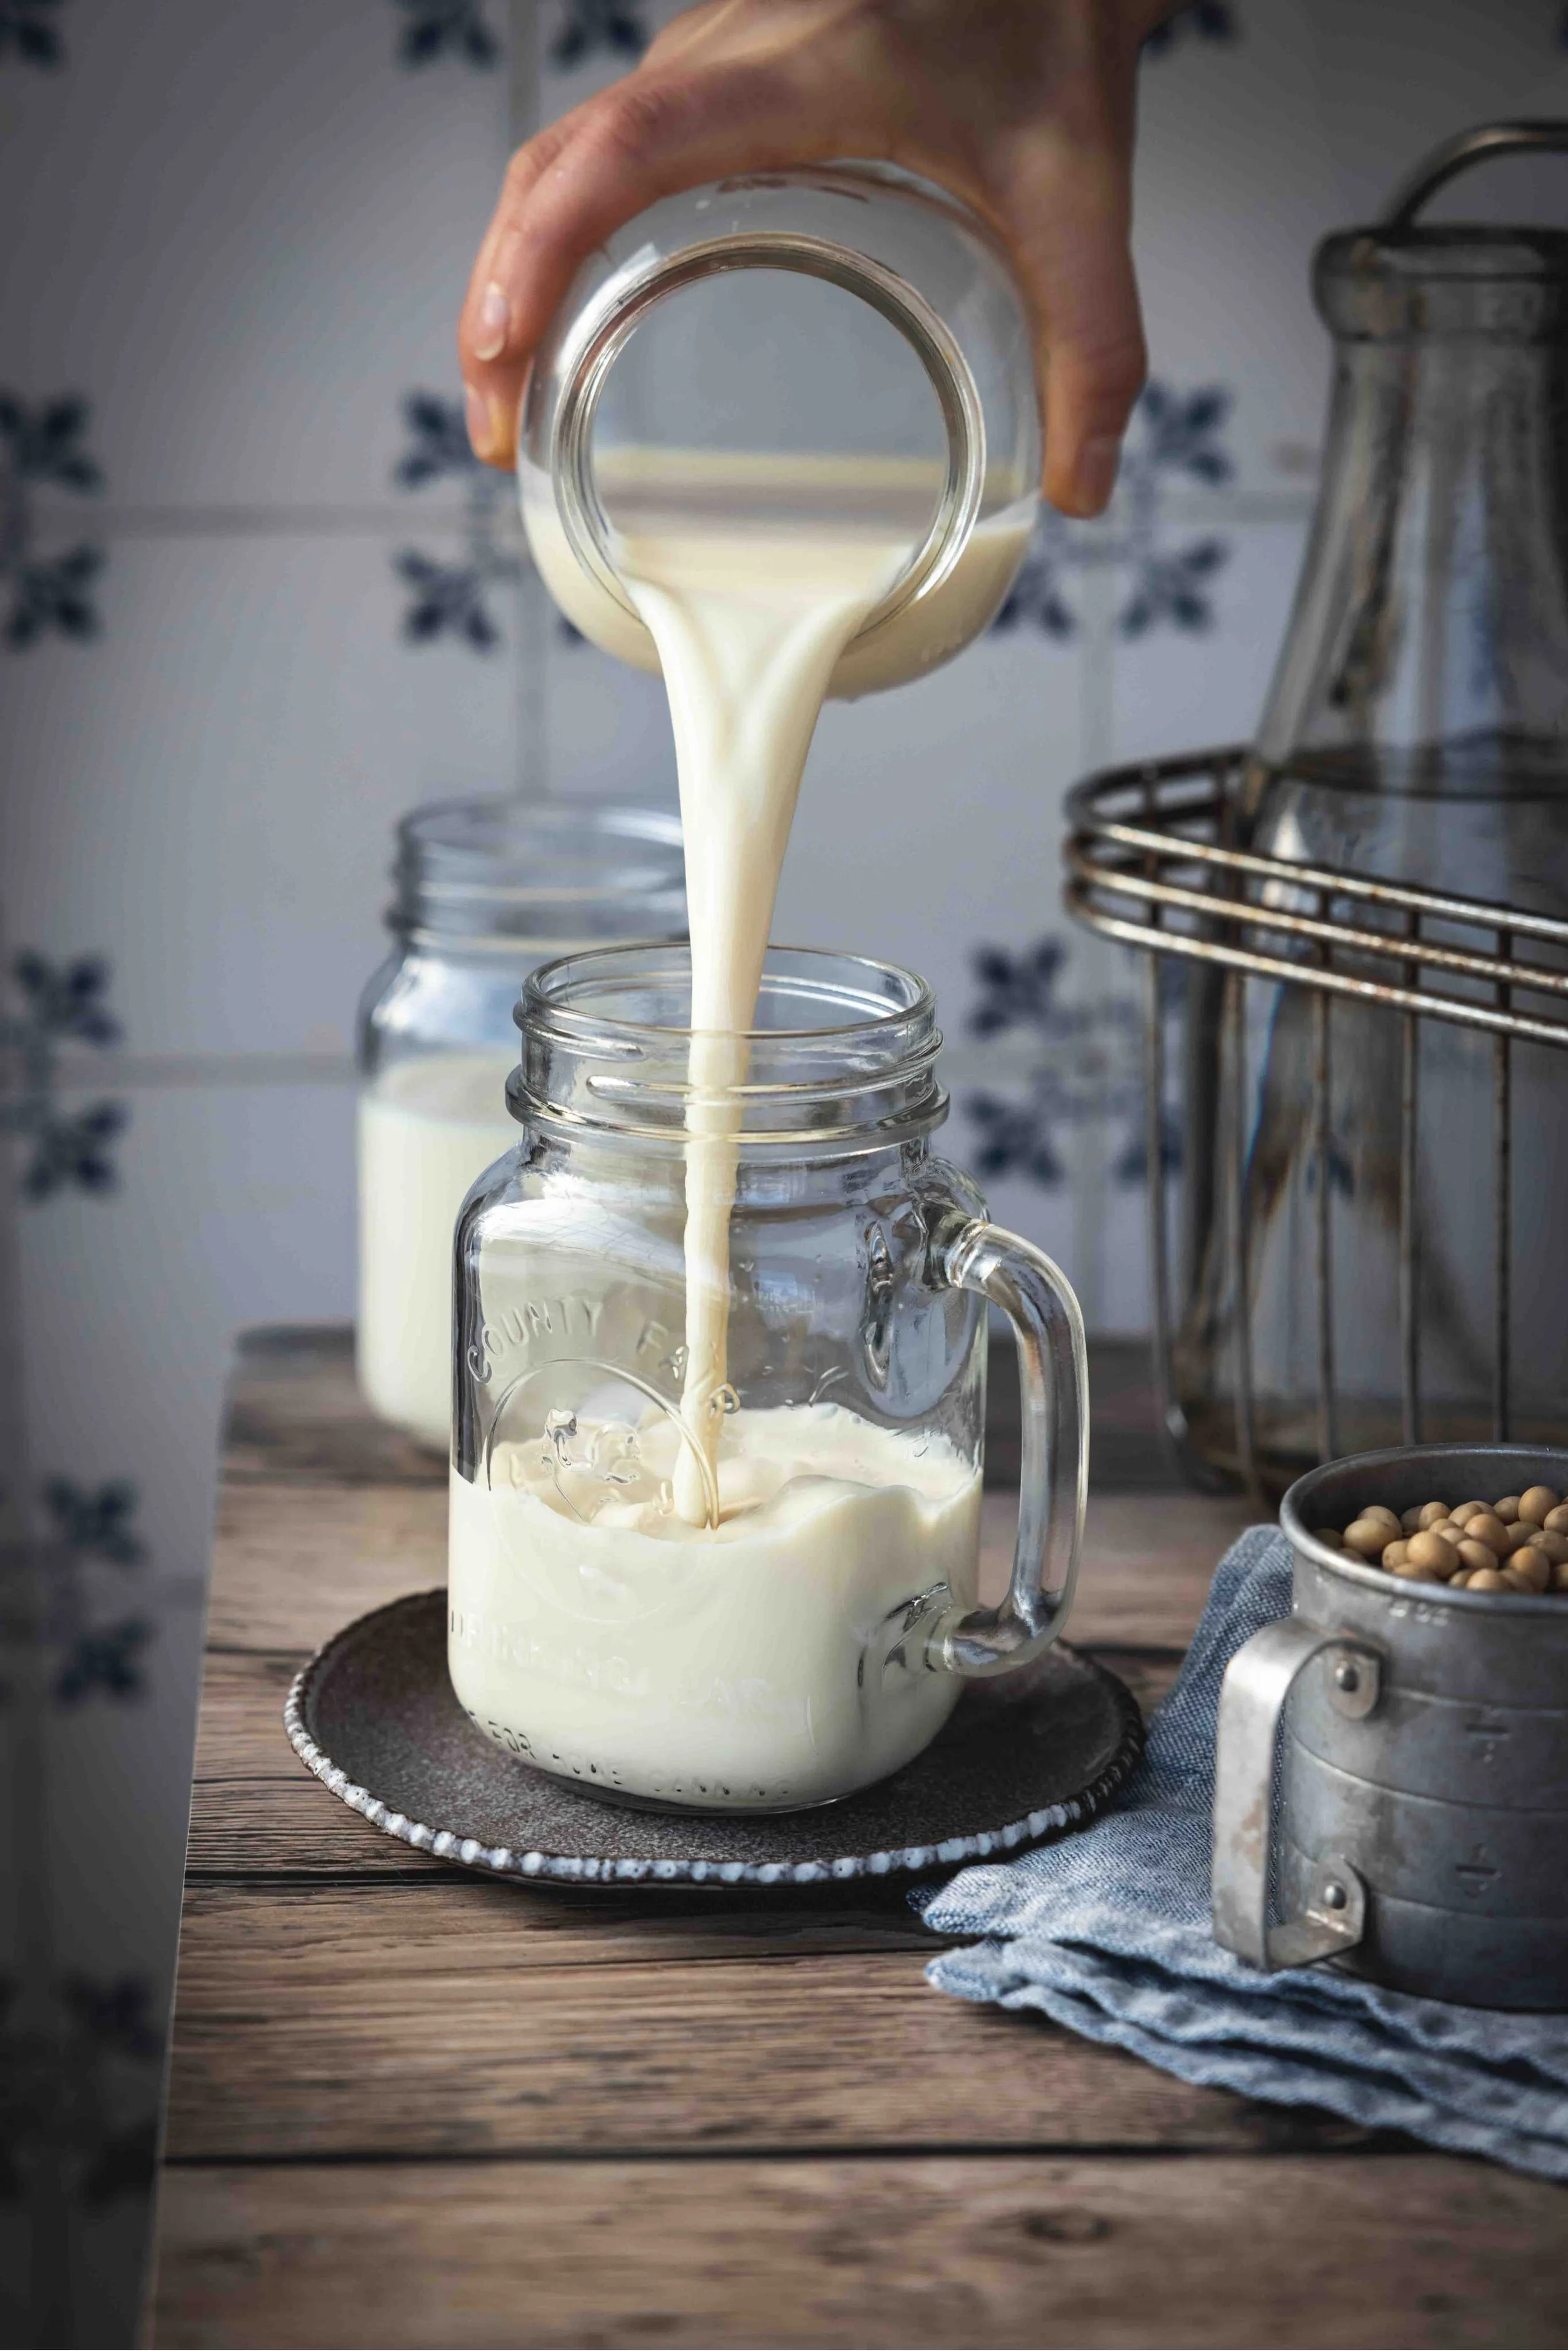
4. Blend with fresh water and strain through a nut bag:
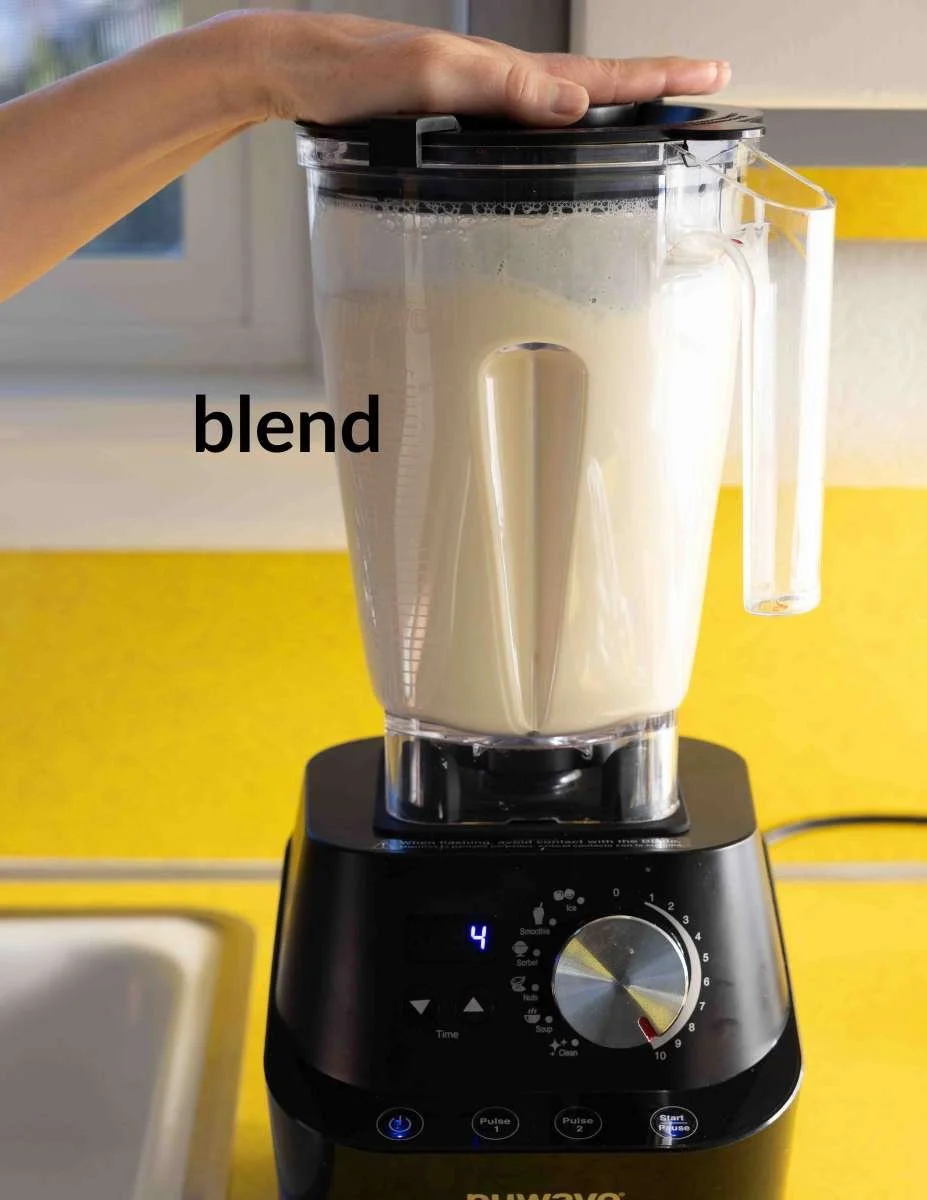
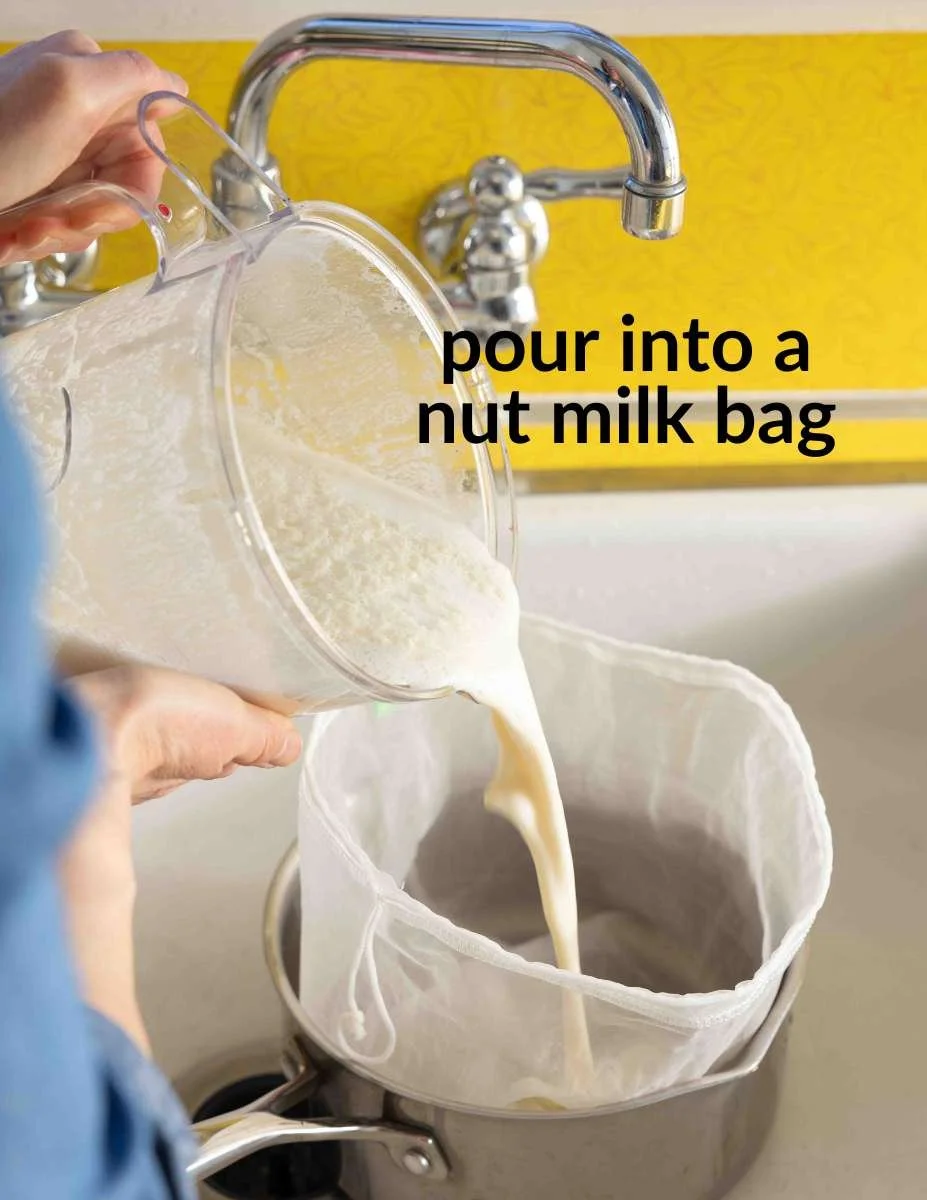
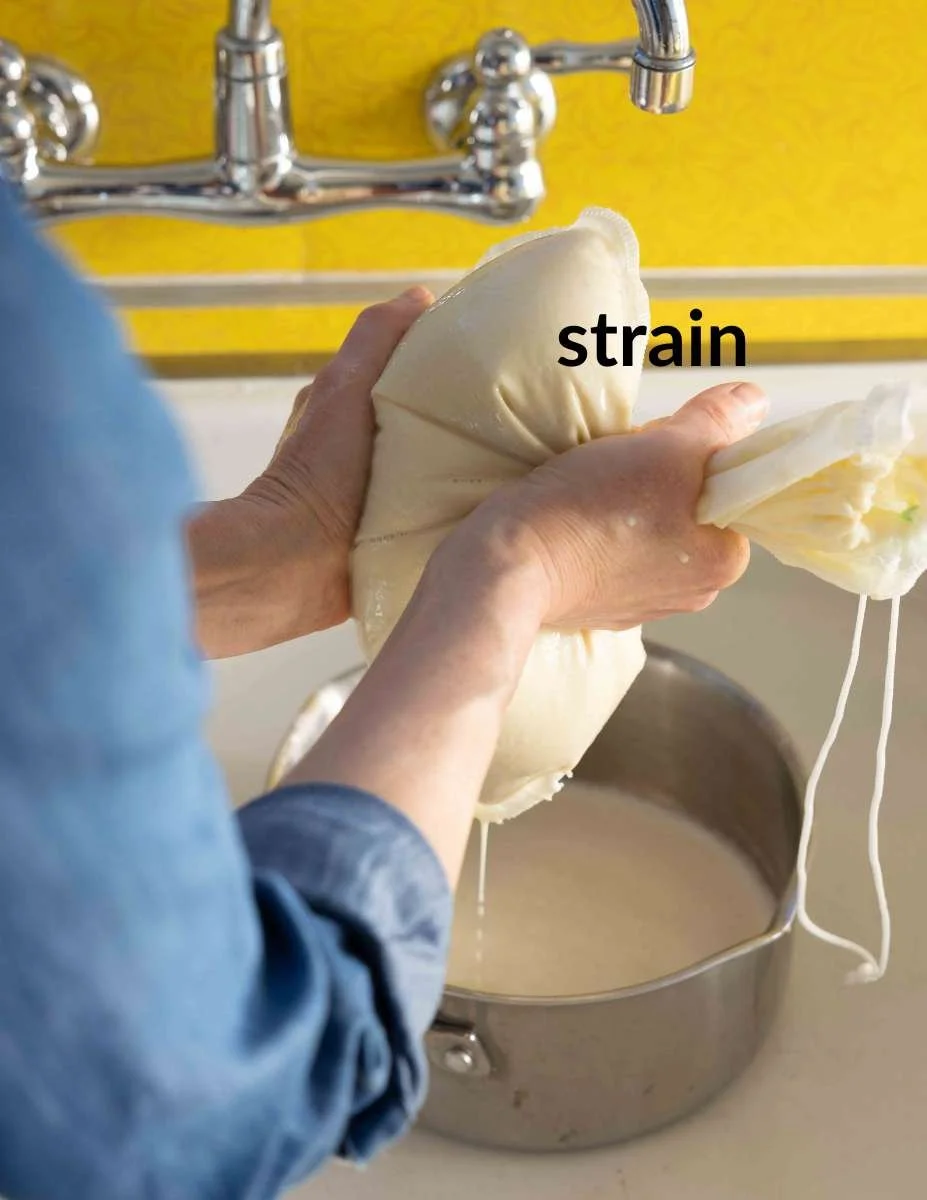
Add the cooled soybeans and 5 cups of fresh water to a large-capacity high-speed blender. Blend at the highest speed for 90 seconds. Pour the mixture into a nut milk bag placed over a bowl or the clean pot. Use your hands to squeeze out all of the milk, leaving only the okara (soybean pulp) behind. See note 2
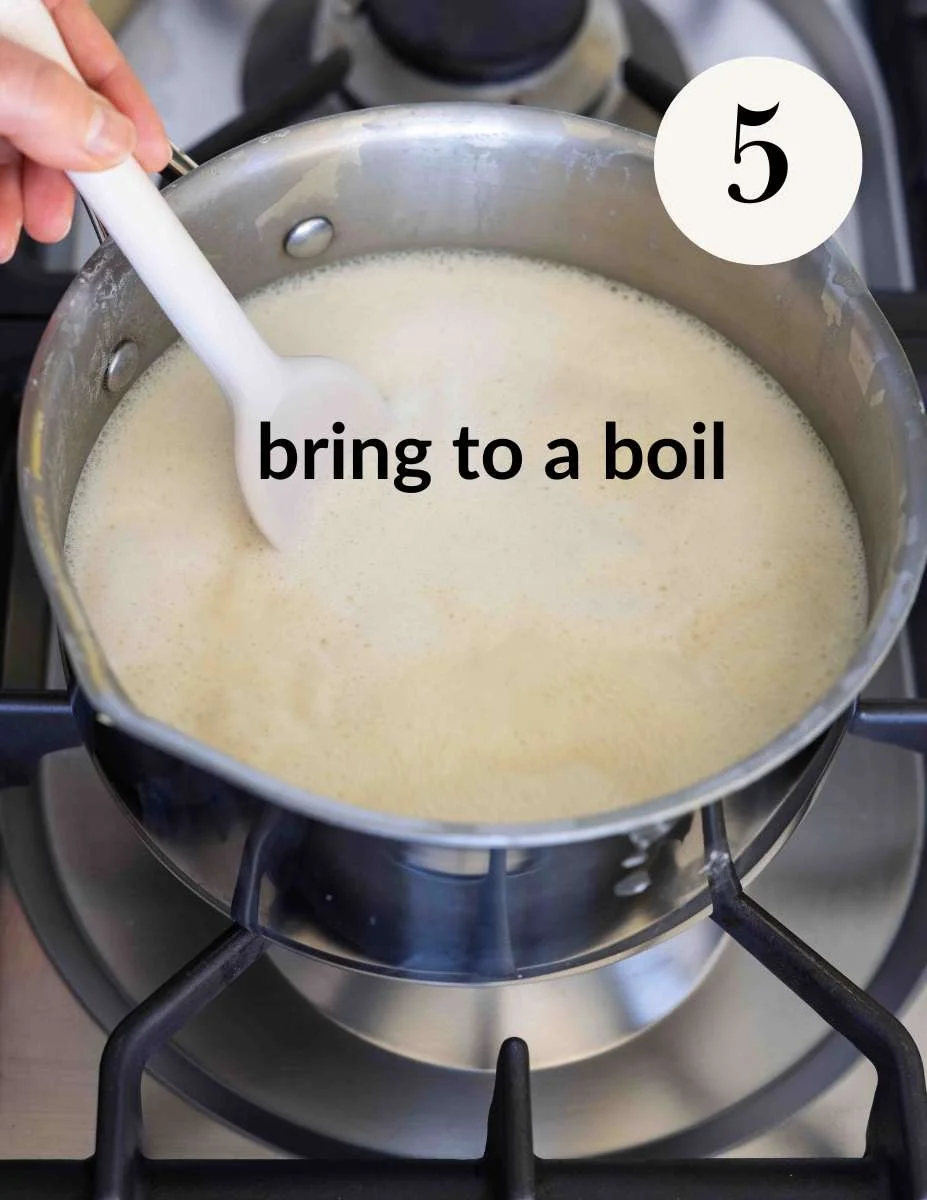

5. Cook for 15 minutes:
Pour the strained soy milk back into the pot with the lid on over medium-high heat. Once it begins to boil, reduce the heat to maintain a gentle simmer and set your timer for 15 minutes. Don’t rush this step! Drag a flexible spatula across the bottom every now and then to prevent any sticking. Keep close to the stove while the soy milk is simmering, as it can unexpectedly boil over the moment you step away. See note 3
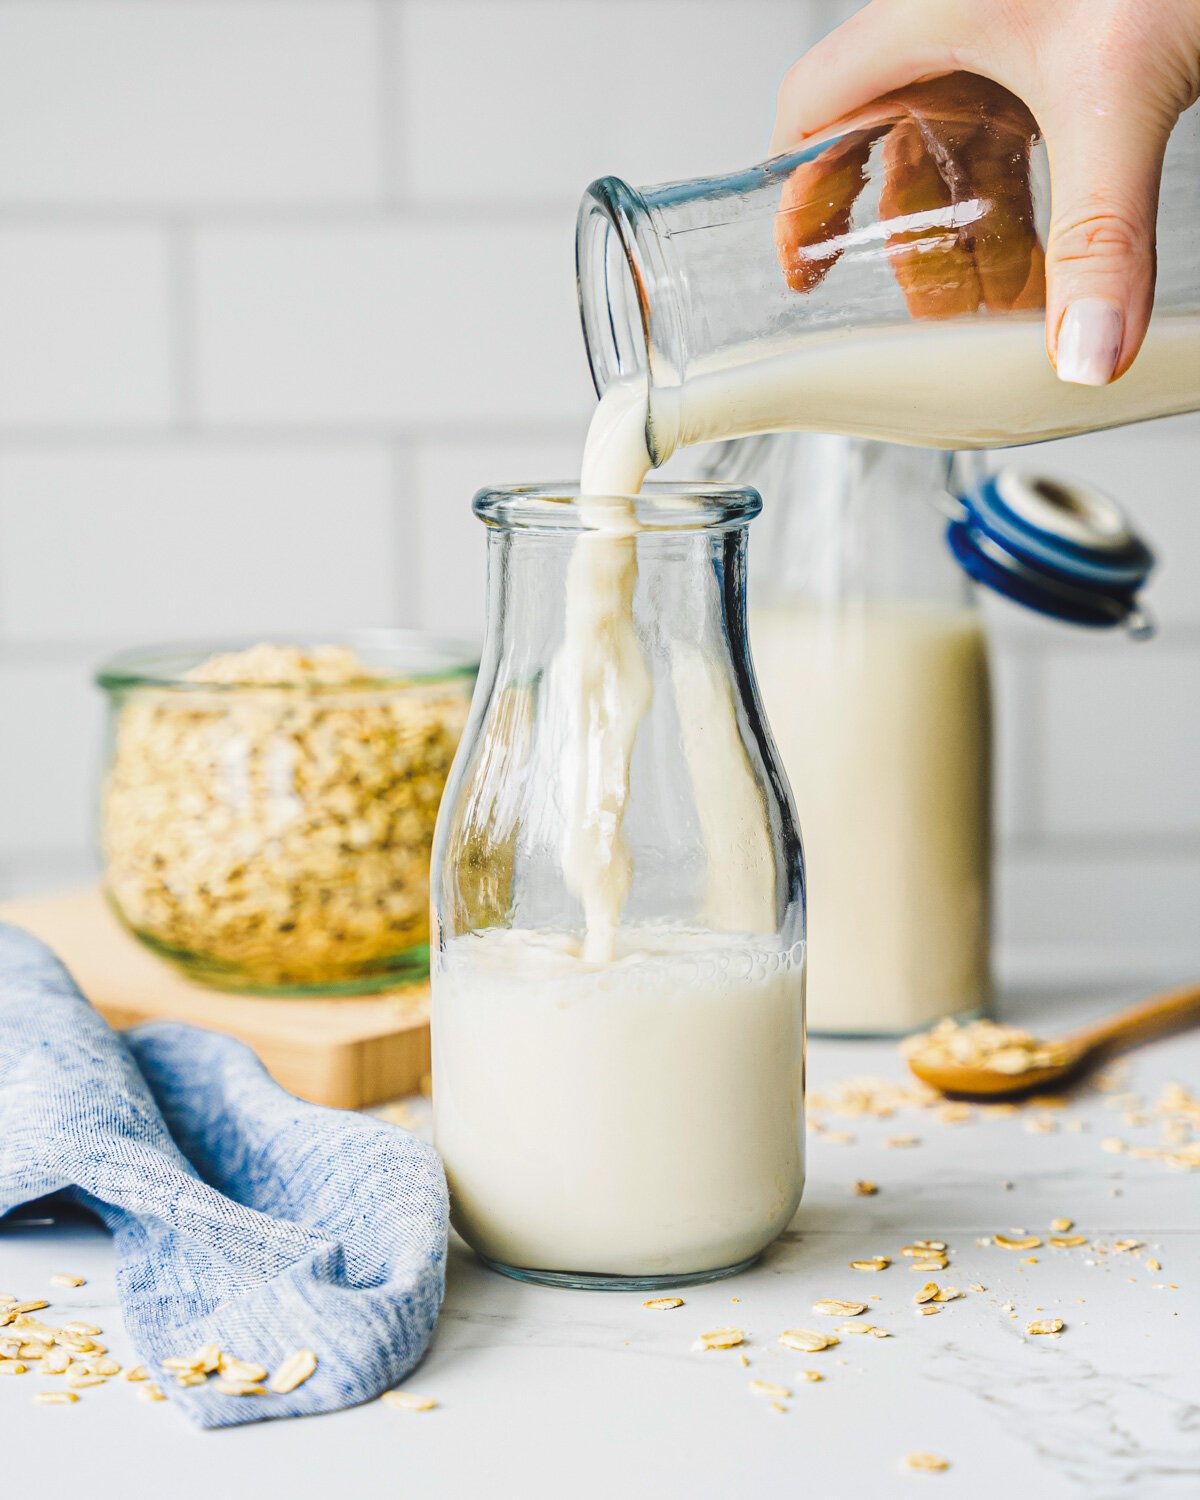
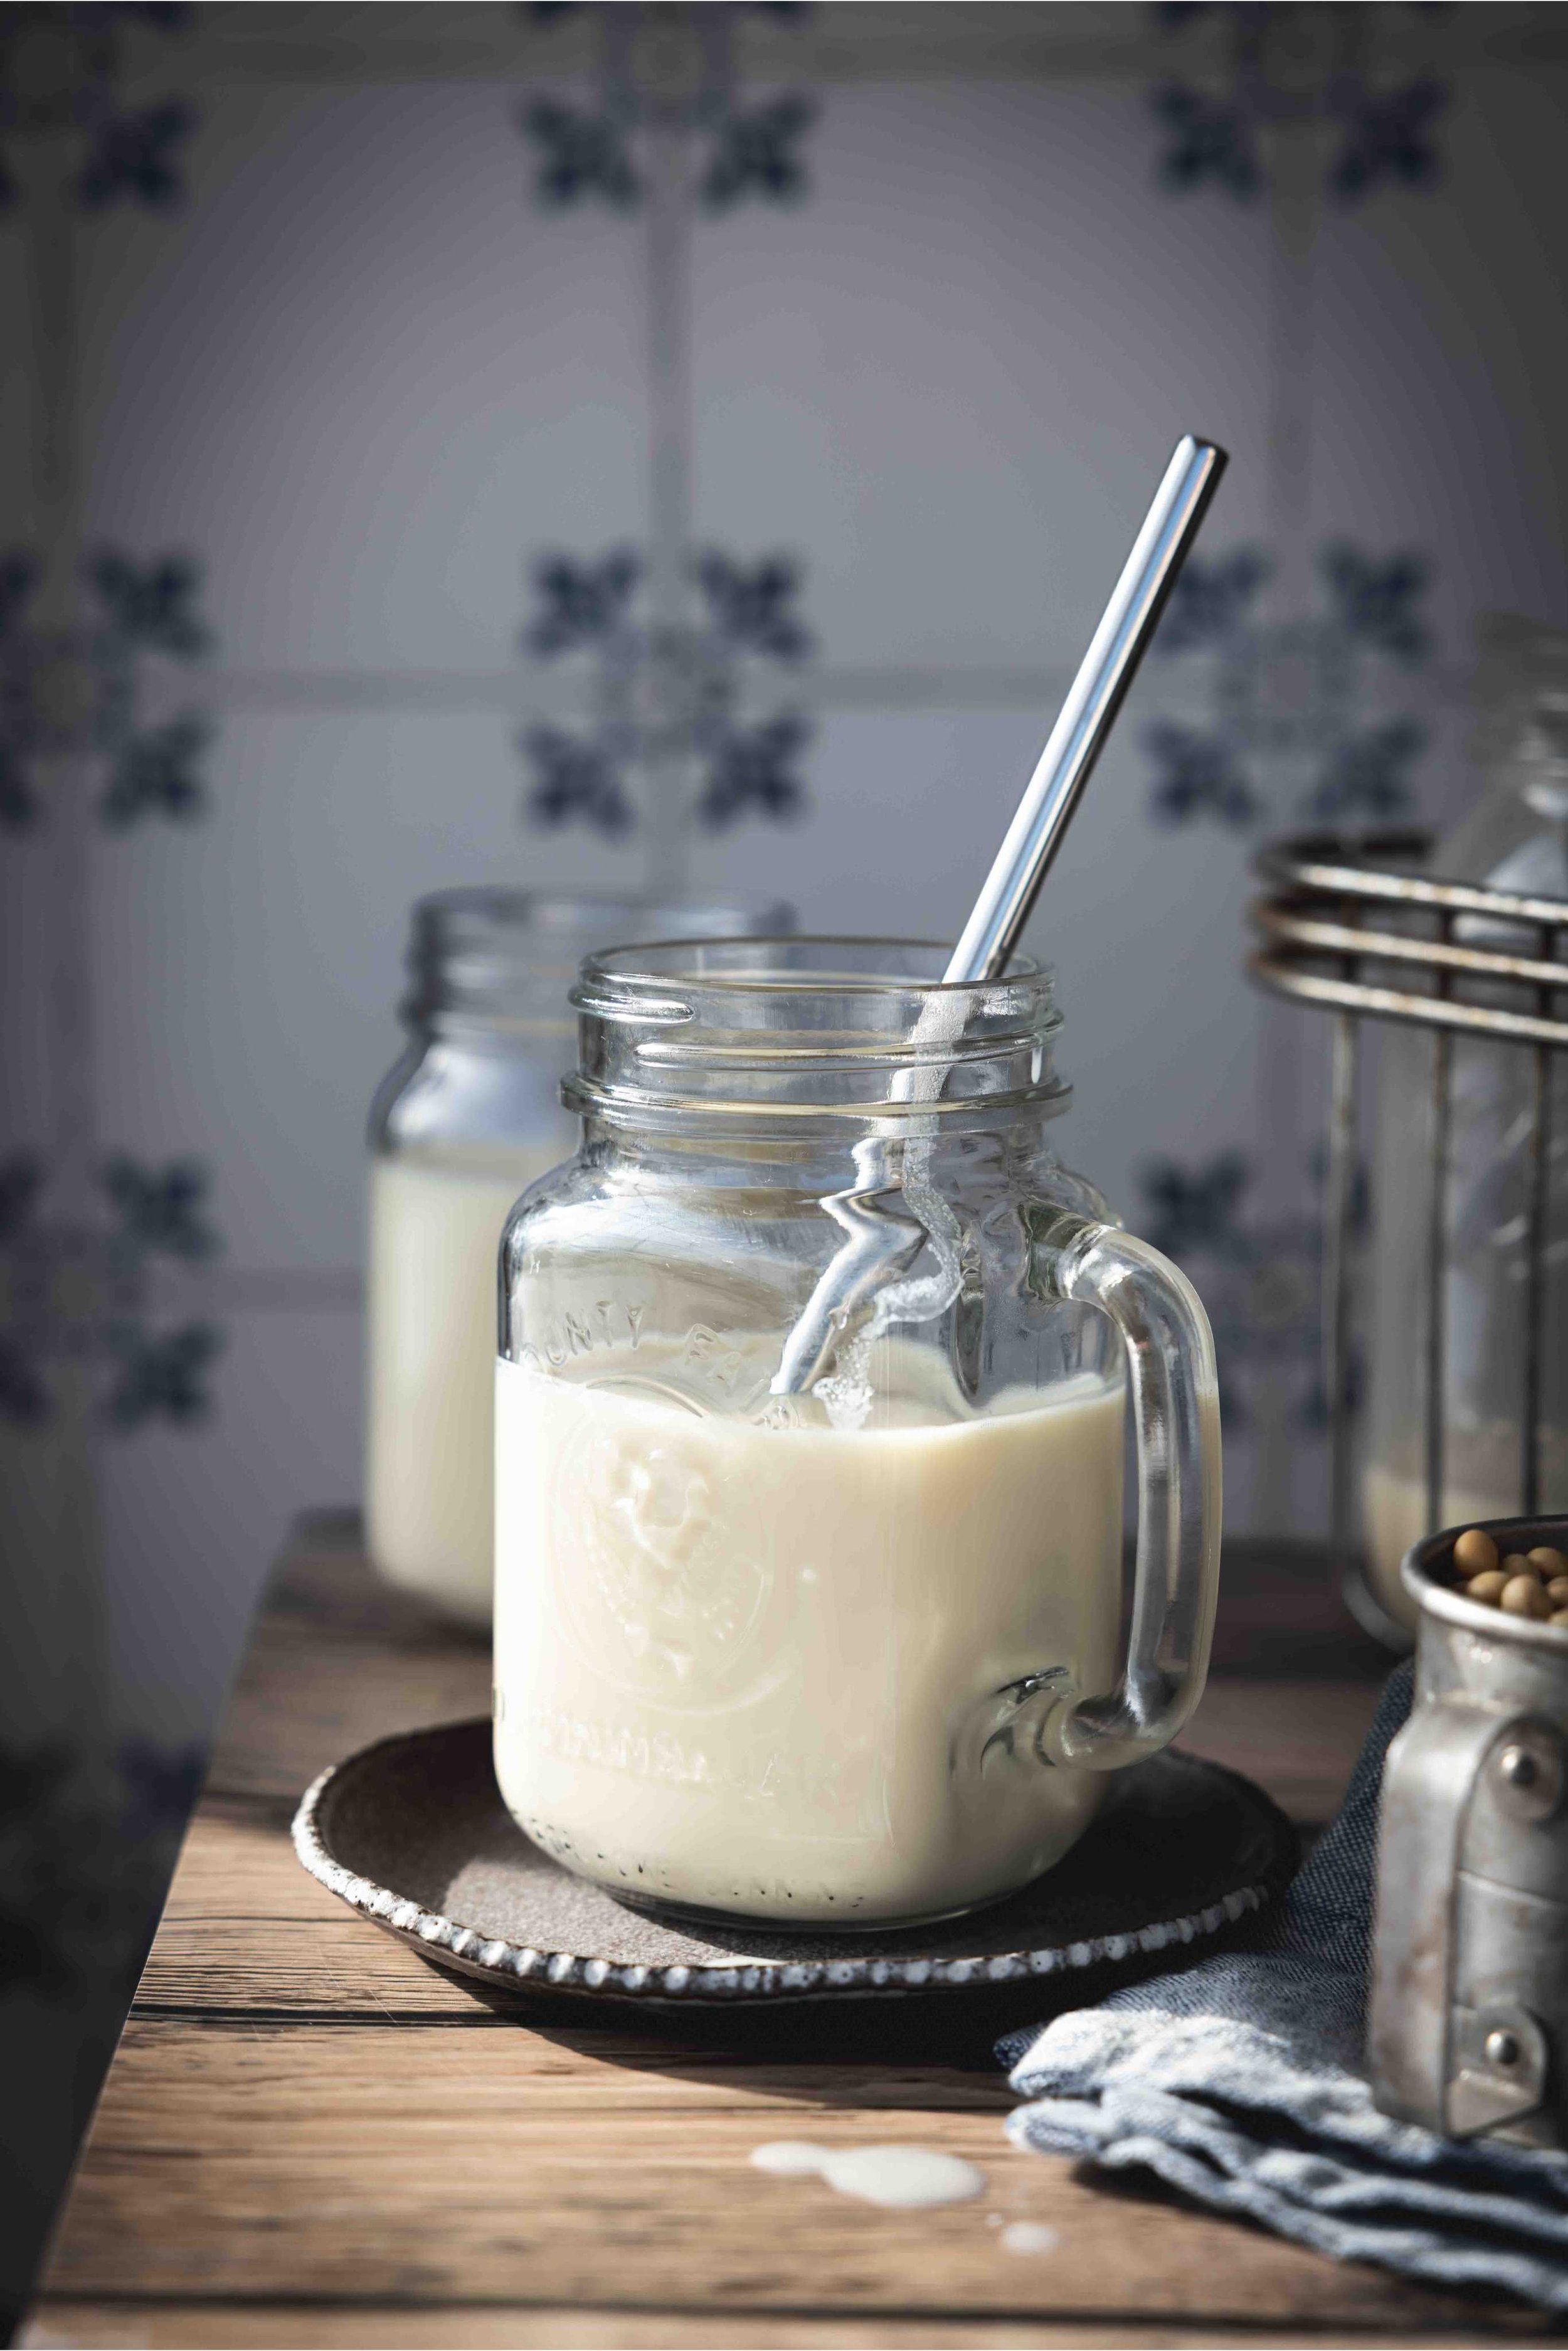
6. Let cool and transfer to a lidded glass jar.
Once cool enough to handle, transfer the soy milk to a clean glass jar, like a mason jar, and secure the lid. Store in the refrigerator for up to a week.
📝 Notes
Note 1
I promise this is the quickest and most effective method to removing the soybean skins! Over time you will develop your own workflow. You may prefer to remove the skins all in one sitting, or in batches as time allows.
I don’t recommend rubbing soaked soybeans between your palms. This method only removes some of the skins, mixes much of the skins back in with the soybeans, and ends up creating more work since you’ll still have to pick the skins out. It also breaks up the soybeans, which makes sorting even harder.
Note 2
Save the okara for a host of other uses. Scroll down to see my favorites!
Note 3
There is no need to skim the foam off the top during the simmering process. It will naturally deflate and cling to the sides of the pot as the soy milk cooks, where it will stay safely out of the way. Simmer for a full 15 minutes to dispel any beany flavor.
❄️ How to Store
In the refrigerator:
Transfer cooled soy milk to a clean lidded glass container, like a mason jar or glass bottle. Glass is ideal because it doesn’t absorb odors and is easy to sanitize. Secure the lid and store in the coldest part of your fridge for 5 days. Separation is natural, so shake before using.
In the freezer:
Follow the same steps above and place the sealed jar in the freezer. It will keep for up to 3 months. Let thaw in the refrigerator and shake before using. After thawing, the texture will be slightly grainy, which is normal for frozen homemade soy milk.
🥞 What to Do With Okara
Homemade soy milk makes a lot of okara or soybean pulp. It’s packed with fiber and protein and is far from being a waste product. Here’s how to put it to good use.
Add to smoothies- Adding ½ cup of wet okara to your morning smoothie is similar to adding protein powder. Wet okara has 9 grams of protein per ½ cup! It also has that familiar chalky texture.
Make dried okara- Dried okara has a long shelf life and is very high in protein and fiber. To dry it, spread the okara in a thin layer on a rimmed baking sheet. Bake at 150°-200°F for 1-4 hours or until it is completely dry to the touch. Use a spatula to stir it around every half hour during the drying process. Blend in a high-speed blender until fluffy. Transfer to an airtight container where it will keep for months, just like protein powder. Store in the pantry, refrigerator, or freezer.
Baking- In muffins, pancakes, or cookies, replace part of the flour with dried okara for extra protein and fiber.
Veggie burgers- Replace the oat flour with dried okara in these hearty Black Bean and Beet Burgers for even more protein.
Soups and Stews- Stir in a small amount to soups and stews to thicken and boost nutrition.
Energy bites- Add to your favorite energy bite recipe for a high-protein post-workout snack.
Check out this clever okara hummus recipe!
⭐️ Tips for Success
1️⃣ Remove the skin from each individual soybean. Now, before anyone has a panic attack, feel rest assured that it only takes about half an hour to deskin the amount of soybeans needed to make 1 quart of soy milk. This is an essential step! It’s the skin of the soybean that is the main culprit for bitter soy milk, and its removal makes all the difference.
2️⃣ Do not rush the simmering process- You will cook the soybeans 3 times in this recipe. First, for hot soaking (unless cold soaking). Second for simmering the deskinning of the soybeans, and third for simmering the soy milk. Start your timer after the liquid has come to a boil, not when you first add the ingredients to the pot. This multistep cooking process dispels any bitterness and beany flavor.
3️⃣ Use a 3-6 quart pot- A medium/large size cooking pot will help prevent the soy milk from boiling over during the last simmering process, saving you from losing any precious milk.
❓FAQs
Is soy milk okay to drink every day?
Yes! Speaking from experience, you can drink soy milk every day. Use it in place of store-bought in any recipe. This includes baking, cooking, in beverages, and enjoying straight from the glass!
Why does my soy milk taste bad?
In most cases, the bitter and beany taste in homemade soy milk comes from bitterness released by the soybean skins and by rushing the simmering process.
Should I soak my soybeans before making soy milk?
Yes! Cold soak your soybeans for 12 hours. Or, hot soak them by boiling them for 5 minutes and then allowing the soybeans to cool in the soaking water for an additional hour.
Do I need to add anything to the soaking water?
Happily, no, you don’t. Unlike soaking dry garbanzo beans, you don’t want acid in the soaking water because it can cause the soy proteins to coagulate, leading to grainy soymilk.
Can I use dehulled soybeans?
If you can locate a reliable source of dehulled or deskinned soybeans, go for it! It will save you the tedious step of removing the skins. You will still need to soak your soybeans before proceeding with the recipe as directed.
What type of nut milk bag should I use?
I’m so glad you asked! Choose a nut milk bag that is large, fine-meshed, and sturdy enough to hold up to repeated uses. My favorite is Ellie’s Best Bigger Better Nut Milk Bag. I use it multiple times a week and love that it is so easy to clean.
Can I use more soybeans for thicker soy milk?
Yes, but there is a trade-off. Increased soybeans will increase the grainy consistency of soy milk. One cup (180 g) of soaked and pre-cooked soybeans, blended with 5 cups of water, is the sweet spot for perfectly thick and creamy, non-grainy soy milk.
Does it separate?
Yes. Separation is natural, and just like store-bought soy milk, homemade soy milk needs to be shaken before serving.
🩵 More Homemade Vegan Milk Recipes

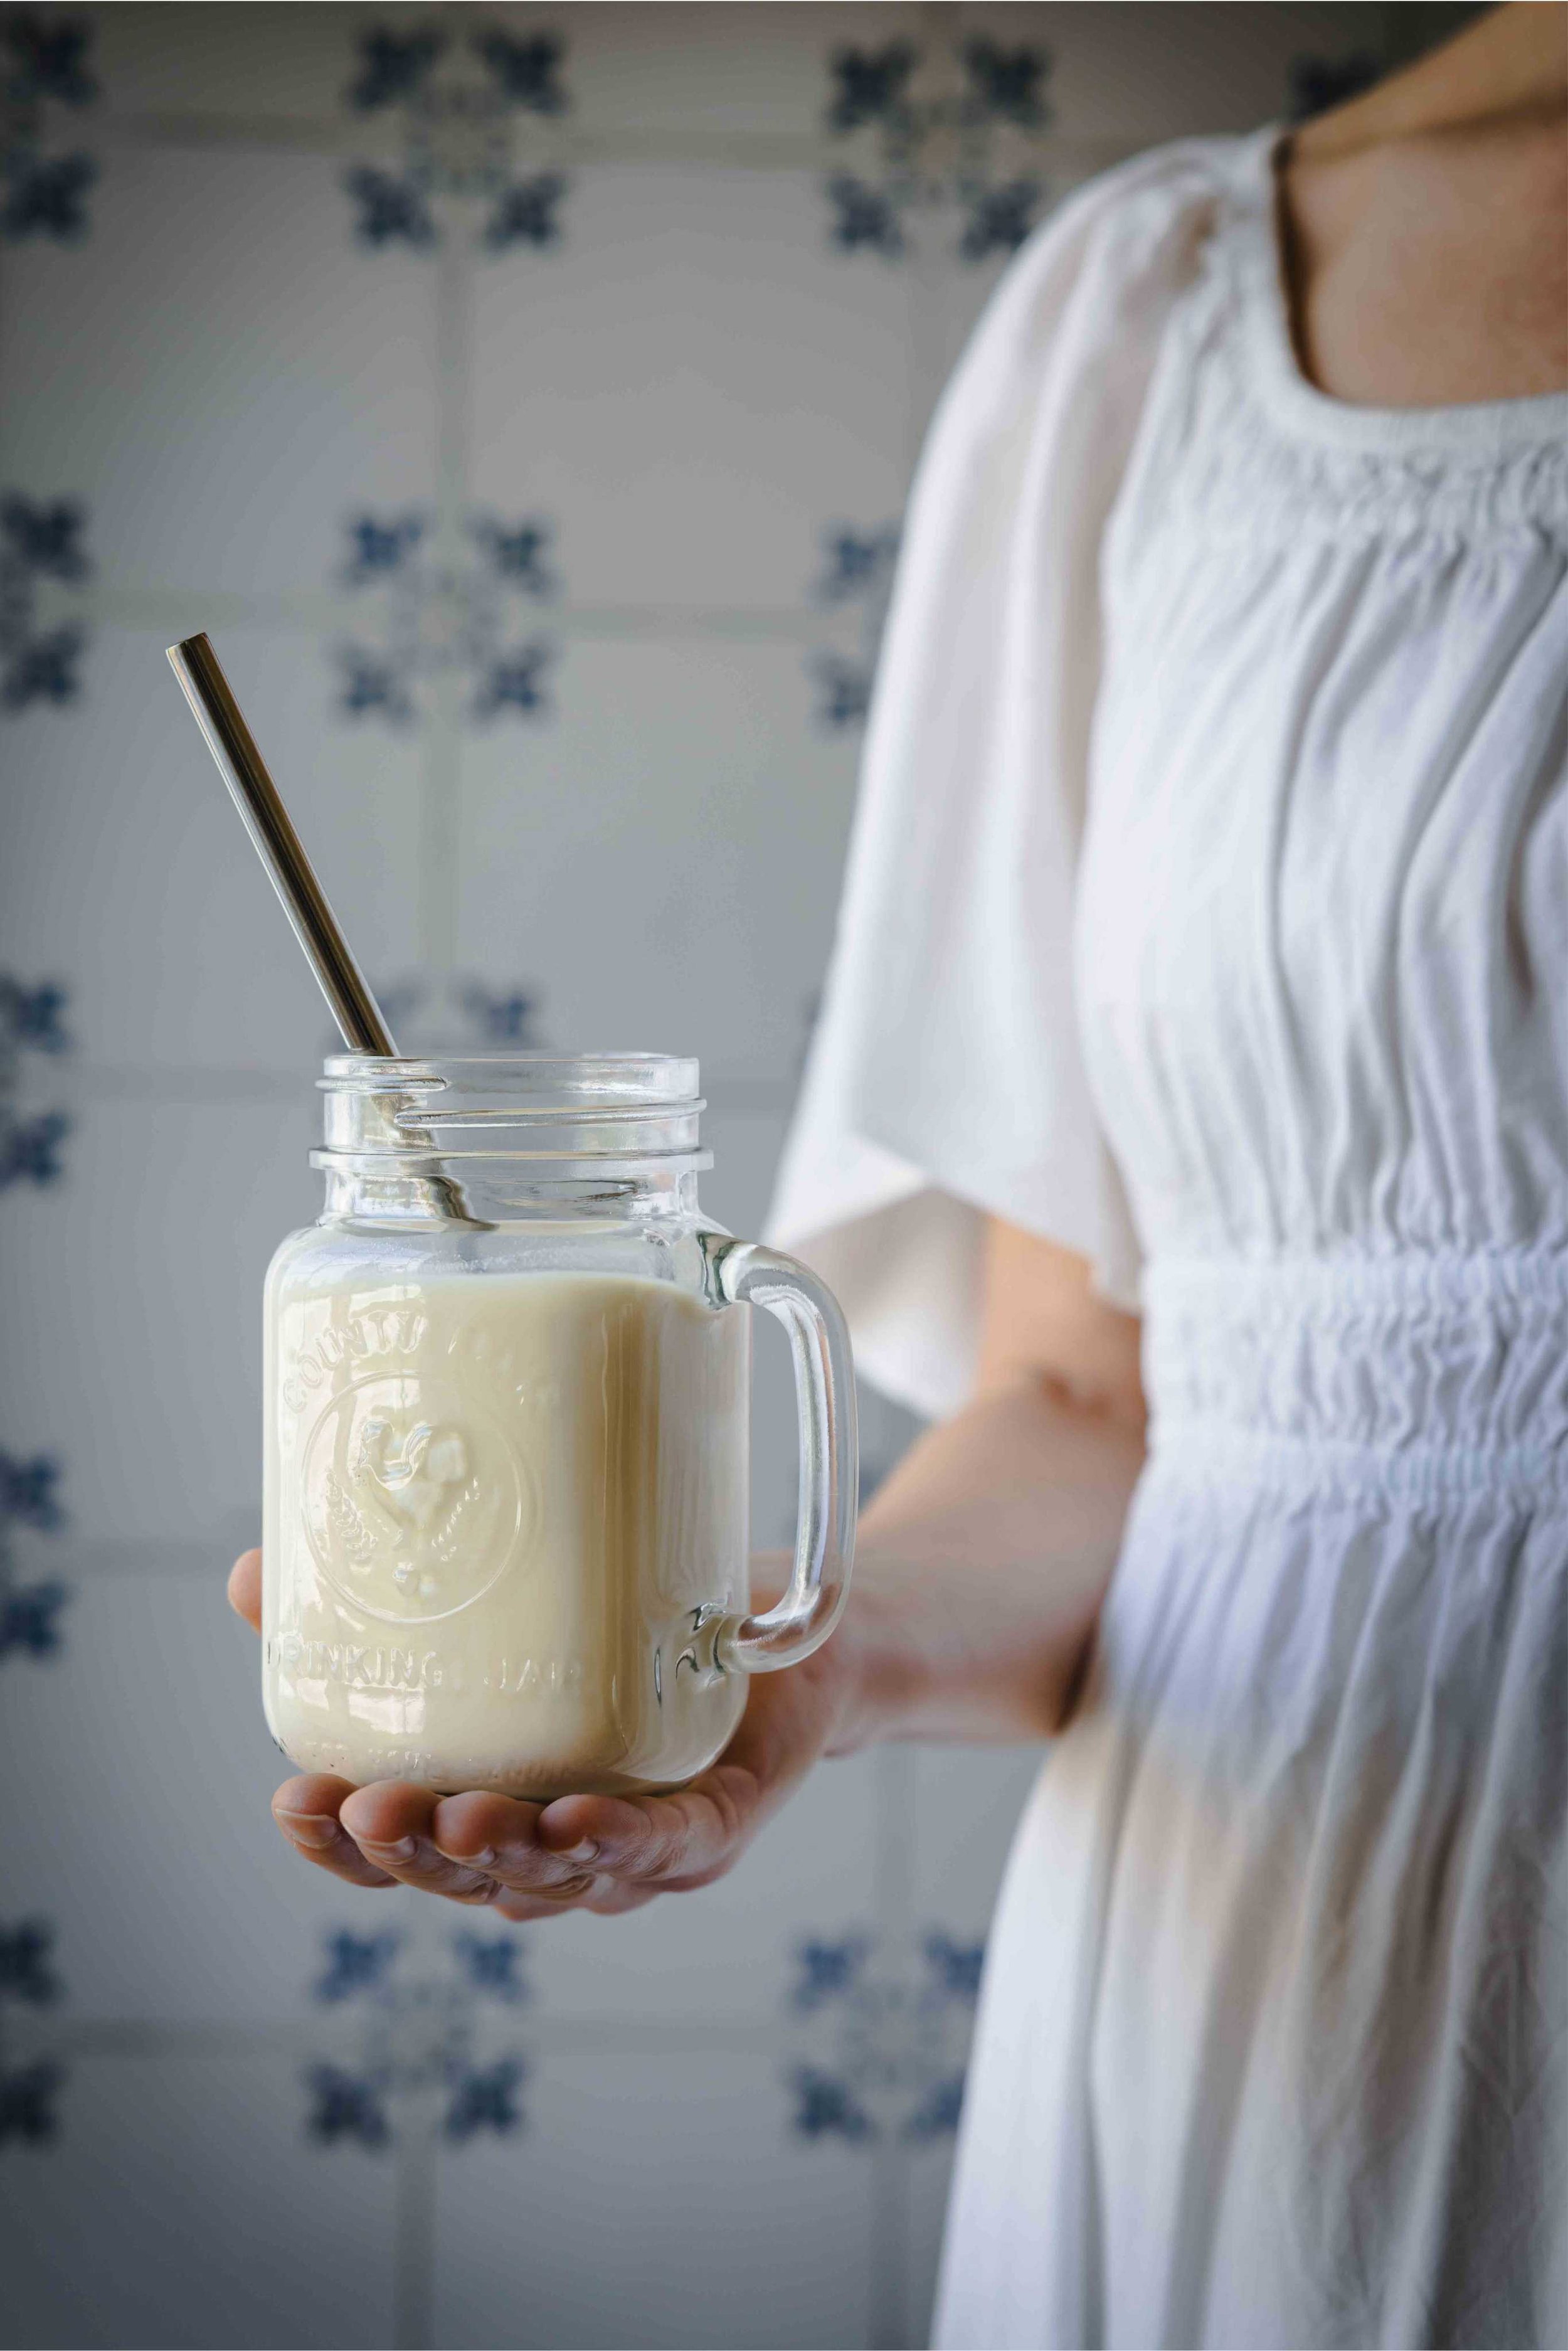
And there you have it, perfectly fresh and creamy soy milk! I’m seriously SO sooooo excited for you to begin making your own soy milk at home! It feels good, on so many levels, to take these steps toward sustainability. I just know you’re going to become a master in no time at all. I’ll be right here cheering you on every step of the way!
Bottoms up, buttercup!
X,o,

Leave a Comment & Rating
If you like this Best Homemade Soy Milk recipe, be sure to leave a comment down below as well as a 5-star rating ⭐️⭐️⭐️⭐️⭐️. This helps others find my website, and I absolutely love hearing about your creations!
And be sure to follow along and tag me on Instagram and Pinterest. Thank you SO much for your support!

Best Homemade Soy Milk
At last! A homemade soy milk recipe that shares everything you need to know to make creamy, fresh soy milk from scratch with NO bitterness! This recipe is vegan, gluten-free, and simpler than you think.
Ingredients
Instructions
- First, cold OR hot soak the dried soybeans: To cold soak – Add the dry soybeans to a medium-sized bowl with 4 cups of water. Place in the fridge for 12 hours. They will double in size. OR To hot soak – In a 3-6 quart pot, bring 4 cups of water to a rapid boil over high heat. Pour in the dry soybeans. Cook for 5 minutes. Slide the pot off the heat and then let cool for 1 hour. They will double in size.
- Next, remove the skins from the soaked soybeans: Before diving in, reassure yourself that it only takes about half an hour to remove all the skins. You can do this! Have 2 bowls ready- one for the soybeans and one for the skins. Scoop up a small handful of soaked soybeans in your hand. Use the other hand to pinch each bean (yes, each bean separately) between your fingers, removing the skin. The skin goes in one bowl; the soybean goes in the other. See note 1
- Simmer the deskinned soybeans before blending: Add the deskinned soybeans and 4 cups of fresh water to the 3-6 quart pot. Bring to a boil and then reduce the heat to maintain a lively simmer. Cook for 10 minutes. Please don’t be tempted to skip this step! It is crucial to remove any bitterness. Drain in a colander and rinse the soybeans in cold water.
- Blend with fresh water and strain through a nut bag: Add the cooled soybeans and 5 cups of fresh water to a large-capacity high-speed blender. Blend at the highest speed for 90 seconds. Pour the mixture into a nut milk bag ( Use code CVK10 for a 10% discount.) placed over a bowl or the clean pot. Use your hands to squeeze out all of the milk, leaving only the okara (soybean pulp) behind. See note 2
- Cook for 15 minutes: Pour the strained soy milk back into the pot with the lid on over medium-high heat. Once it begins to boil, reduce the heat to maintain a gentle simmer and set your timer for 15 minutes. Don’t rush this step! Drag a flexible spatula across the bottom every now and then to prevent any sticking. Keep close to the stove while the soy milk is simmering, as it can unexpectedly boil over the moment you step away. See note 3
- Let cool and transfer to a lidded glass jar. Once cool enough to handle, transfer the soy milk to a clean glass jar, like a mason jar, and secure the lid. Store in the refrigerator for up to a week.
Notes
Note 1
I promise this is the quickest and most effective method to removing the soybean skins! Over time, you will develop your own workflow. You may prefer to remove the skins all in one sitting, or in batches as time allows.
I don’t recommend rubbing soaked soybeans between your palms. This method only removes some of the skins, mixes much of the skins back in with the soybeans and ends up creating more work since you’ll still have to pick the skins out. It also breaks up the soybeans, which makes sorting even harder.
Note 2
Save the okara for a host of other uses. Scroll up to the blog post to see my favorites!
Note 3
There is no need to skim the foam off the top during the simmering process. It will naturally deflate and cling to the sides of the pot as the soy milk cooks, where it will stay safely out of the way. Simmer for a full 15 minutes to dispel any beany flavor.
❄️ How to Store
In the refrigerator:
Transfer cooled soy milk to a clean lidded glass container, like a mason jar or glass bottle. Glass is ideal because it doesn’t absorb odors and is easy to sanitize. Secure the lid and store in the coldest part of your fridge for 5 days. Separation is natural, so shake before using.
In the freezer:
Follow the same steps above and place the sealed jar in the freezer. It will keep for up to 3 months. Let thaw in the refrigerator and shake before using.
⭐️ Tips for Success
1️⃣ Remove the skin from each individual soybean. Now, before anyone has a panic attack, feel rest assured that it only takes about half an hour to deskin the amount of soybeans needed to make 1 quart of soy milk. This is an essential step! It’s the skin of the soybean that is the main culprit for bitter soy milk, and its removal makes all the difference.
2️⃣ Do not rush the simmering process- You will cook the soybeans 3 times in this recipe. First, for hot soaking (unless cold soaking). Second for simmering the deskinning of the soybeans, and third for simmering the soy milk. Start your timer after the liquid has come to a boil, not when you first add the ingredients to the pot. This multistep cooking process dispels any bitterness and beany flavor.
3️⃣ Use a 3-6 quart pot- A medium/large size cooking pot will help prevent the soy milk from boiling over during the last simmering process, saving you from this tragedy.
For step-by-step instructions with photos, faqs, and more, scroll up to blog post!
Nutrition Facts
Calories
135Fat (grams)
7 gSat. Fat (grams)
0 gCarbs (grams)
9 gFiber (grams)
2 gNet carbs
7 gSugar (grams)
3 gProtein (grams)
12 gSodium (milligrams)
5 mgCholesterol (grams)
0 mgNutritional information is provided as a courtesy and is an estimate only. This information comes from online calculators.